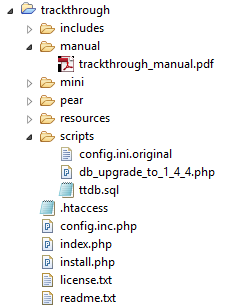
License agreement

 
Permitted use
You are permitted to use‚ copy‚ modify‚ and distribute the Software and its documentation‚ with or without modification‚ for any purpose‚ provided you understand and agree the following:
Indemnity
You agree to indemnify and hold harmless the authors of the Software and any contributors for any direct‚ indirect‚ incidental‚ or consequential third-party claims‚ actions or suits‚ as well as any related expenses‚ liabilities‚ damages‚ settlements or fees arising from your use or misuse of the Software‚ or a violation of any terms of this license.
Disclaimer of warranty
THE SOFTWARE IS PROVIDED "AS IS"‚ WITHOUT WARRANTY OF ANY KIND‚ EXPRESSED OR IMPLIED‚ INCLUDING‚ BUT NOT LIMITED TO‚ WARRANTIES OF QUALITY‚ PERFORMANCE‚ NON-INFRINGEMENT‚ MERCHANTABILITY‚ OR FITNESS FOR A PARTICULAR PURPOSE.
Limitations of liability
YOU ASSUME ALL RISK ASSOCIATED WITH THE INSTALLATION AND USE OF THE SOFTWARE. IN NO EVENT SHALL THE AUTHORS OR COPYRIGHT HOLDERS OF THE SOFTWARE BE LIABLE FOR CLAIMS‚ DAMAGES OR OTHER LIABILITY ARISING FROM‚ OUT OF‚ OR IN CONNECTION WITH THE SOFTWARE. LICENSE HOLDERS ARE SOLELY RESPONSIBLE FOR DETERMINING THE APPROPRIATENESS OF USE AND ASSUME ALL RISKS ASSOCIATED WITH ITS USE‚ INCLUDING BUT NOT LIMITED TO THE RISKS OF PROGRAM ERRORS‚ DAMAGE TO EQUIPMENT‚ LOSS OF DATA OR SOFTWARE PROGRAMS‚ OR UNAVAILABILITY OR INTERRUPTION OF OPERATIONS.


Introduction

 
What is TrackThrough?
TrackThrough is an application that monitors, tracks and plans the activities of a particular project. The software acts as a common place online but yet private to exchange the required information and documents through.
Features of TrackThrough:
  • Defines projects and tasks
  • Leads and teams concept
  • Streamlines work flow and aids in task assignment and delegation
  • Tracking issues
  • Progress reporting relating to tasks and issues
Why TrackThrough?
Although there are a range of other project management software options available to business, which even in some cases offer better features, TrackThrough is simple, easy to use and is an extremely efficient tool to work with. It is designed to have very few features, but just enough to achieve what one needs to within a business such as:
  • It is an excellent add-on to your current website to monitor projects.
  • It acts as a shared document repository but is still private enough to distribute the required documents through.
  • Teams and projects can be managed remotely.
  • It is a FREE application (includes complete source).
TrackThrough is designed to be used by many businesses. These include consulting firms, small to medium sized companies, professional firms as well as educational institutions.
TrackThrough is freely available for any purpose, please visit license page for more details.
We welcome your suggestions and feedbacks to make it simpler‚ leaner and useful.
Please feel free to write to us for any questions or feedbacks.

System requirements

 
To install the TrackThrough‚ your system should have the following requirements.
Server Logo


A PHP supported webserver
A webserver with PHP support is required; preferably Apache.
TrackThrough will work on Apache 1.3 or Apache 2.x hosted on unixes or windows or others (but not tested).

PHP Logo
PHP
PHP of version 5 or higher is required.

MySQL Logo


MySQL 4.1 or MySQL 5.0
Your host should allow the database accounts with the following rights:
SELECT‚ INSERT‚ UPDATE‚ DELETE‚ CREATE‚ DROP‚ INDEX‚ ALTER‚ CREATE TEMPORARY TABLES‚ LOCK TABLES.

Release notes

 
TrackThrough version 1.4.4 [14 May, 2015]
  • New user interface - completely redone [new]
  • Stats feature in dashboard [new]
  • Priority feature for task and issues [new]
  • Sorting task and issues improved [new]
  • User profiles with avatar [new]
  • Hiding of unwanted projects [new]
  • New filters (priority and date) in reports tab [new]
Known issues
  • No more supported on IE6/IE7 and lower versions of browsers.
TrackThrough version 1.4.3 [9 January, 2014]
  • Copy issue feature [new]
  • New themes: Lime and Black [new]
  • Admin login name edit issue fixed [bug fix]
  • Uploads folder [security fix]
  • Layout changes in dashboard, admin site settings page, profile page, user registration page
  • User can't delete his own message when the task/issue is closed [bug fix]
  • Task export feature [new]
  • Wider layout and fixed header
  • Disallow user deletion [new]
  • Change owner/lead feature [new]
  • Issues export bug [bug fix]
  • Attachment type settings by admin [new]
  • HTML encoding issue in tooltips [bug fix]
  • Message display issue during blank attachement upload [bug fix]
  • Display issue when attachment name is too long [bug fix]
  • Once the task is unassigned for the team, the respective message is sent to team, team is unable to read the message (the unread message is kept as unread only). It's status doesn't change, and the message icon doesn't disappear [bug fix]
  • The user is able to assign the user who does not have execute task permission [bug fix]
  • Progress value remains same when task is copied from one project to another [bug fix]
  • Text wrapping issue usually when there are long characters without any gap (Fixed in all browsers except opera-9.64) [bug fix]
TrackThrough version 1.4.2 [7 March, 2013]
  • Issue tracking [new]
  • Promote issue as task [new]
  • Export issues to PDF format [new]
  • Filter projects, tasks and issues [new]
  • Task reports and issue reports [new]
  • Status icons [new]
  • Assigning tasks to multiple users [new]
  • Closing, re-opening, review and re-assign of tasks [new]
  • Dashboard [new]
  • New settings related to dashboard, search [new]
  • Message inbox [new]
  • Site settings feature for Admin [new]
  • New permission types - view only and execute project [new]
  • Bookmarks renamed to favorites [new]
  • Edit profile, update settings and logout are under single drop-down menu [new]
  • Message and email issues resolved [bug fix]
Known issues
  • Text wrapping issue usually when there are long characters without any gap
  • Display issue when attachment name is too long
  • Once the task is unassigned for the team, the respective message is sent to team, team is unable to read the message (the unread message is kept as unread only). It's status doesn't change, and the message icon doesn't disappear.
  • The user is able to assign the user who does not have execute task permission
  • Progress value remains same when task is copied from one project to another.
TrackThrough version 1.4.1 [1 October, 2012]
  • Improved mobile access - trackthrough/mini. [new]
  • Search feature. [new]
  • Copying tasks from one project to another. [new]
  • Feature to add/change project icon.[new]
  • Feature to edit project and task descriptions. [new]
  • Feature to preview image attachements. [new]
  • Large file download issue. [bug fix]
  • Task assignment issue. [bug fix]
  • Task comment mandatory(*) field removed.
  • Design change - Improved user permission model. [new]
TrackThrough version 1.4 [15 May, 2012]
  • Mobile friendly web application - trackthrough/mini. [new]
  • Progress bar widget in project (or task) dashboard. [new]
  • Customizable themes. [new]
  • Bookmark feature for projects, tasks and messages. [new]
  • Accordion feature for project dashboard. [new]
  • Attachment icons based on file types. [new]
  • User specific settings to control number of projects and messages to be displayed. [new]
TrackThrough version 1.3.1 [25 February, 2012]
  • Improved installation page. [new]
  • Style configurations for iPhone. [new]
  • Bug fixed in settings module. [bug fix]
TrackThrough version 1.3 [21 November, 2011]
  • Unread messages - link to unread messages on user dashboard [new]
  • Editing of project and task titles (for leads) [new]
  • Hyperlinked project and task descriptions [new]
  • Alternate colors for sent/received messages [new]
  • Attachment upload size display [new]
  • Unique message identifiers for project and task correspondences [new]
  • Copy of all correspondences to the administrator [new]
  • Improved error reporting [bug fix]
TrackThrough version 1.2 [20 May, 2011]
  • Fixed mail issues [bug fix]
  • Added CSS to support iphone [new]
Please check manual/trackthrough_manual.pdf for installation instructions and usage.


Upgrading from version 1.4.3 to 1.4.4

 
1. Please make a backup of your current installation folder and database.
2. Download TrackThrough version 1.4.4
Download the latest trackthrough_1_4_4.zip from https://www.bispark.com/trackthrough/download and extract (unzip) this to a temporary directory.
e.g.: extract trackthrough_1_4_4.zip to /temp/trackthrough_1_4_4.
Copy the contents of includes, manual, mini, resources and scripts folder from above download to your current installation.
e.g.:
cp /temp/trackthrough_1_4_4/includes to /var/www/trackthrough/
cp /temp/trackthrough_1_4_4/manual
to /var/www/trackthrough/
cp /temp/trackthrough_1_4_4/mini
to /var/www/trackthrough/
cp /temp/trackthrough_1_4_4/resources
to /var/www/trackthrough/
cp /temp/trackthrough_1_4_4/scripts
to /var/www/trackthrough/
3. Edit config.ini file
Edit config.ini file in your installation folder as shown below:
[ETC]
project_attachment_folder=uploads/project/
mail_template_folder=resources/mail_templates/
attachment_icons_folder = attachment_icons
hashed_password=false
version = 1.4.4

[THEMES]
default_theme = black
names=grey,lime,violet,red,plum,black

4. Run upgrade script
Open command console, change to scripts folder.
e.g.: cd /temp/trackthrough/scripts
Run db_upgrade_to_1_4_4.php script as shown below:
e.g.: php db_upgrade_to_1_4_4.php
Caution: Please change the localhost, username, password, database name and prefix according to your previous installation settings in the db_upgrade_to_1_4_4.php file.

Installation instructions

 
bispark home page
Download TrackThrough
Download the latest trackthrough_x_x.zip (compressed source) file from https://www.bispark.com/trackthrough/download.
Unzip trackthrough_x_x.zip file into your webserver's document root.
e.g.: C:\Program Files\Apache Software Foundation\Apache2.2\htdocs or /var/www/html (please check your webserver documentation to find out correct document root path).
If you have configured a virtual host‚ use the appropriate directory to unzip the source.

screenshot of directory structure
Directory structure
After you unzip the source please verify that the installation directory resembles the screenshot.
Please make sure the folder templates_c is writeable for web user.


screenshot of TrackThrough installation page
screenshot of TrackThrough installation success page
Web installation
To install TrackThrough, you need to run install.php from web browser.
  1. Visit the following URL using your favorite browser http://yoursite.com/trackthrough/install.php; this should take you to a page (please check the screen shot) asking to input following details - database name, database server, database user name and database user password.
  2. Input the database particulars.
  3. Input Admin username, Admin password, Admin email address & submit. If everything goes fine, you should see an installation success page (please check the screenshot).
If you had problem using the web installation you may want to try the manual installation procedure explained in the next section.


screenshot of php myadmin

screenshot of config ini page

screenshot of config ini page
Manual installation
  1. Create TrackThrough database
    Create a database (e.g.: ttdb) using phpMyAdmin or any other MySQL client.
    Import the database schema from file ttdb.sql (you can find schema file inside scripts folder).
    e.g.: mysql –udbusername –p –h localhost ttdb < C:\...\your_
    installation_directory\scripts\ttdb.sql
  2. Configure ini file
    Copy the file config.ini.original from installation_directory/scripts to installation_directory /config.ini.
    e.g.: copy   your_installation_directory\scripts\config.ini.original   your_
    installation_directory\config.ini
  3. Edit config.ini to modify the following variables
    Base URL: Web address of for your installation
    (http://yoursite.com/trackthrough)

    Database name: Database source name – ttdb (the one you created above).

    Database server: The MySQL server. It can also include a port number.
    e.g.: hostname:port or a path to a local socket
    e.g.: :/path/to/socket for the localhost
    If the PHP directive mysql.default_host is undefined (default)‚ then the default value is localhost:3306.

    Database username: Default value is the name of the user that owns the server process.

    Database password: Default value is an empty password.


Common error messages
Application is already installed; please remove 'config.ini' file and run this script to reinstall the application
You get this error when TrackThough is already installed. To reinstall the application‚ access the installation URL after removing the config.ini file.
Missing config file in the distribution source
The file config.ini.original is missing from your source.
Please check installation_directory/script folder for the config.ini.original file.
Can't create ini file
The installation directory may not have write/create permission for web user.
Could not connect to MySQL Server
The error indicates incorrect database particulars.
Could not create database. Database already exists
The database you are trying to create already exists. Select YES option for Have you already created a database? and resubmit the values. You may also want to input table prefix if you are sharing the database with other applications.
There is no database by name ..............
The database is not yet created; you can create the database manually and resubmit the page. Alternatively select NO option for Have you already created a database? and resubmit the values.
Missing sql file in the distribution source
You may have not copied the correct installation source.
Invalid config file
You may have not copied the correct installation source.


Getting started

 
Welcome to TrackThrough!
It is advisable for all newcomers who are not familiar with TrackThrough to start and go through our introduction set.
TrackThrough can be downloaded from this link: https://www.bispark.com/trackthrough/download.
And for newcomers who require some assistance with installing TrackThrough, you can find the installation instructions.

Below are some terms to familiarise yourself with:
Admin: A user, who has access to all the features of TrackThrough.
Leads: A user who can lead a group of projects and teams, define projects, tasks and can assign tasks to teams.
Teams: A group of users who execute tasks, they can only access their own tasks.
Attachments: Documents shared through a project and task messages.
Project: A collection of tasks.
Tasks: Tasks are the activities that make a project.
Issues: An issue is a trouble ticket or incident ticket recorded by testers or end users.
Messages(Comments): Information, feedback or instructions pertaining to a task or project.

TrackThrough concepts
TrackThrough is a web application and has the following:
  • Web Client which is accessed using your browser.
  • Application backend which is installed in a location at web server.


Administer site settings

 
You will be required to login to the administration account to make the following changes:
screenshot of settings page
Select the tab Site Settings from main menu


screenshot of settings page
From email address
The email address reflected in the from address field when you receive application generated emails.


screenshot of settings page
Company name
This reflects the name of the company which uses the TrackThrough application.


screenshot of settings page
Copy mails of project or task messages to administrator
This is a check box that needs to be selected or not, depending on which option you prefer. It is advisable to check this box as this will allow you or the administrator to receive copies of emails relating to projects or task messages that are actually intended to keep the administrator informed of all happenings on TrackThrough.

screenshot of projects page
Attachment settings
This reflects the attachment files that the user can upload to his project, task, issue or comments. This may be useful if the administrator needs to restrict certain file formats. If no file formats is specified in the field, the users can upload png and zip files by default.


How to create teams or leads?

 
In order to create leads or teams, you will be required to login into TrackThrough as an administrator.
screenshot of users page
Select the tab Users from main menu

screenshot of users page
Click the link + New user

screenshot of registration page
Input user details
You will then be required to add the personal details of the user you would like to add. These details include registration details such as the user's email address, the user's first name as well as the user's last name.

You will need to select an appropriate user(login) name you are creating, a password you will need to set permissions for the user, for instance if a user is allowed to create tasks and/or execute tasks, these permission are selected in the form of check boxes, click submit and you have successfully created a user.


Dashboard

 
You need to login to TrackThrough to view dashboard. The Dashboard is made up of 4 blocks where you are able to view latest messages, stats, tasks assigned to you and tasks assigned to others.
screenshot of dashboard pie chart page
Stats
It includes number of open, inprogress, review pending and closed tasks for logged-in user; also open and clossed issues for the user.

screenshot of dashboard page
Tasks for others
These are the tasks you own and assigned to others for execution. You can click on these tasks to visit the task page.

screenshot of dashboard page
Tasks for me
These are tasks that have been assigned and allocated to you.

screenshot of dashboard page
Latest messages
This is where you can view all the latest messages and updates relating to you, information on the tasks assigned to you, users which have been added or removed and simply just general information.


User settings

 
Login to TrackThrough system and go to profile menu (at extreme right of menubar).
screenshot of settings page
Select Settings menu
You can find settings related to application management. Below are the settings you find:

General settings:
screenshot of settings page

Users per page (for admin only)
This option is only available to an administrator and this is where you would select how many users are displayed in the users tab.

screenshot of settings page
Projects per page
This is where you can select how many projects you view on a single page at your projects page.

screenshot of settings page
Task comments per page
Here you select how many comments are displayed per task, meaning that you will not view all comments at once, but in pages reflecting the number of comments you selected.

screenshot of settings page
Maximum messages per page
Select how many messages you would like to be displayed at messages tab.

Dashboard settings:
screenshot of settings page
Maximum records per block in dashboard
Here you are able to select how many records are displayed at dashboard block.

screenshot of settings page
Show latest unread messages
Select the checkbox to display unread messages at unread messages block.

screenshot of settings page
Show tasks assigned to others
Select the checkbox to display task assigned to others if you are the lead of any project and have assigned the task to other users.

screenshot of settings page
Show tasks assigned to me
Select the checkbox to display task assigned to you if you want to view latest task assigned to you at dashboard page.

Promoted tasks settings:
screenshot of settings page
Close task when issue is closed
Select the checkbox if you want the promoted task to be closed automatically when the related issue is closed.

screenshot of settings page
Close issue when task is closed
Select the checkbox if you want the promoted issue to be closed automatically when the related task is closed.

Issue report settings:
screenshot of settings page
Show all comments for open issues
Select the checkbox to show all comments of open issues when exporting the issues to PDF.

screenshot of settings page
Show only closing comments for closed issues
Select the checkbox to show only closing (last) comment of closed issue when exporting the issues to PDF.

screenshot of settings page
Show attached image with comments in export PDF
Select the checkbox to show attached image along with comments when exporting issues to PDF

Search preferences:
Select the check box to include the contents to be searched during your regular search from search, e.g. keep the search issue details checked. to look for all issues having a required search term in the title or description.

screenshot of settings page
Search project details
Select the checkbox to search content from projects.


screenshot of settings page
Search task details
Select the checkbox to search content from tasks.


screenshot of settings page
Search issue details
Select the checkbox to search content from issues.


screenshot of settings page
Search message box
Select the checkbox to search content from messages.

Hide Projects:
Select check box to hide project. The hidden projects won't be displayed in projects and reports tab.

screenshot of settings page

Hide projects
Select check box to hide project. The hidden projects won't be displayed in projects and reports tab.


How to add projects

 
In order to add new projects, you need to login to TrackThrough system and your account must have the permission to create projects. Select the Projects tab and click +New.
screenshot of lead projects page
Click the button + New

screenshot of add project page
Enter project details
You will then be required to enter project details such as a project title and a full project description describing what the project is about, what the project entails as well as any other important details pertaining to the project you wish to add.
You will have an option to upload a project logo, should you have one or want to upload an image. If you are in possession of any documents, training materials or any other documents about the project, you will then be given the option to upload these documents under the project you wish to add.
You will then be required to click submit to successfully add your project. If there are any errors or missing information, the system will let you know and you will be required fix the errors or upload the missing information before you will be allowed to successfully submit and add your project so that it can become visible and others can view your new project.

How to add tasks?

 
You need to login to TrackThrough system and must be the owner of project to add tasks to the project. You will then be required to click on Projects tab, or project view to enable you to add a task onto TrackThrough.
screenshot of project view page
Click the button + New

screenshot of add task page
Add task details
You will then be taken to a further screen where you will be required to add the task title; this is the name you would like to give to the specific task you would like to add.
You will then be required to give a task description. This refers to the full details about the task you would like to add, what the task entails, how to perform it and all other important details pertaining to the task you would like to add.
The next section is where you will be able to add any documents, training manuals or any other documentation relevant to the task you would like to add.


Assigning task

 
screenshot of task view page

screenshot of task view page
How to assign a task?
You need to be a project owner or an administrator to assign tasks to other users.
  • Select the tab Projects from main menu.
  • Locate the task you want to assign and click to open the task page.
  • Click the link Assign task (you can find the link just below the task description), select users and permissions. You can give the user either View Only or Execute Task permission, depending on what you require from the user.
If you would like the user to only view the task, then select the view only option. The user will then be able to view the task correspondences and documents, but that would be all. If you would like the user to carry out the specific task, you will be required to select the execute task option. By selecting this option the user will be able to correspond and complete the task that has been allocated to the user.

screenshot of projects page

screenshot of projects page
View-only task(s)
You can see view-only tasks in project and project view page. When tasks are assigned to user as view-only the font color of the task appear in grey color which indicates it is view-only task. View-only tasks can be useful in assigning task to users where you don’t want the user to comment or attach files to task but only watch and download content of that task.


Managing tasks

 
You need to login to the TrackThrough to perform the operations below:
screenshot of task view page
Requesting task to review
Once a user has successfully completed a task which has been assigned to him or her, the user will have to then set the task for review.

screenshot of task view page
Closing or re-assigning the task
Once the project owner has reviewed these tasks which reviews have been requested for, and if the task has been satisfactorily completed, the project owner may then click Close Task, or in the case where a task is not completed satisfactorily, the project owner may then select the Re-assign Task and then allocate the same task to another user to complete or correct errors that the first user made.

screenshot of task view page
Opening closed task
Once a task has been completed and closed, the project owner is authorised to re-open the same should they so wish and for whatever reason they choose to do so.


Copying and moving tasks

 
You need to login to TrackThrough system and must be the project owner or an administrator to do the following operation. Select the tab Projects from main menu. Locate the task you want to copy and click to open the task page.
screenshot of copy task
Copy task for the project owner
The owner of the project can copy task to another project he or she owns. Select Copy task from task view page.

screenshot of copy task
Copy task for Admin
An administrator can copy a task to any project that he or she chooses to. This can be done by simply selecting Copy task from the task viewing page.

screenshot of copy task
Select destination project
In order to do this, you need to select the destination of a project to which you would like a specific task copied to. You are allowed to erase the original task once you have successfully copied the task which you wanted to copy.


Task reports

 
You need to login to TrackThrough system and select Tasks tab. This section allows users to view and export tasks that are based upon user, project and status.
screenshot of task report page
Assigned to me
In the tasks menu, locate the Assigned to me tab and click on it to see all tasks which have been allocated to you. You will also be able to filter all your tasks based on the project, Priority, Date and task status.

screenshot of task report page
Assigned to others
Under the tab, Assigned to others you will be able to view tasks that have been allocated to other users, by yourself and like your own tasks; you can also filter these according to project Priority, Date and task status.

screenshot of task report page
Open tasks
In the Open tasks tab you can find all tasks which are still open, but not yet assigned to a user and filter these by project, Priority, Date and task status.

screenshot of task report page
Task reports for administrator
The admin user can view task report by selecting the user which displays both tasks assigned to others by the selected user as well as tasks assigned to selected user. Later admin can also filter by project or task status to display tasks.

Exporting task reports
In order to view the tasks in PDF format, go to task view page and carry out the steps as listed below.

screenshot of projects page
Select the Project from Select project drop down and than select the status of the task from Select status drop down and click on GO button.

screenshot of projects page
As soon as you click on GO button, new button appears Export (PDF) and all the related tasks displayed on the screen. Click on the Export (PDF) button to download the pdf.


How to add issues

 
You need to login to TrackThrough system and must be an owner of the project to enable issue tracking for the project.
screenshot of project view page
Enable issue tracking
  • Select the tab Projects from main menu.
  • Locate the project you want to enable issue tracking and click to open the project page.
  • Click the link Enable issue tracking.

screenshot of project view page
Add users to issue tracking team
Click the link Add new user (you can find the link just below the project description) and add users to add issues to the project.

screenshot of add issue page
Add new issue
You need to be a member of issue tracking team to be able to add issues.
  • Select the tab Projects from main menu.
  • Locate the project you want to add an issue and click the link Add new issue. Alternatively open the project page and click the link Add new issue to add an issue.

screenshot of add issue page
Add issue details
You will then be prompted to add an issue title, this will be a name you have chosen for the particular issue you would like to add, and then the next line will request issues details. Here you are required to add all relevant details about the issue.
There next section will request attachments.


How to send messages?

 
Please use your login details to be able to send message via the TrackThrough system. Normal, simple users will not be authorised in the form of their permission settings to be able to access sending messages.
screenshot of select task
Select task
Once you have successfully logged into your account, you must select the task in order to be able to access the task. If you have been issued with team login details you are able to send messages to the project owner that has been assigned to you.
If you have been issued with lead credentials, you are authorised to send messages to the team that is working on your projects which you have assigned to them. This is the ideal way in which to keep in touch and keep everyone well informed.

screenshot of task view page
Enter comment details
You will then be required to click on the blue Comment button where you will be able to enter the message which you need to get to users working on tasks you have assigned. You will also have the option to attach and upload documents to distribute information you wish to get to your users.


  Mails and Messages generated by application on user actions.

Sl.No Action Mail To Message
1. Create user User --
2. Create project / task Admin Admin
3. Modify project title and description Admin, Team, Lead Admin, Team
4. Add project description Admin, Team, Lead Admin, Team
5. Add / Remove issue tracking team member User, Admin, Lead User, Admin
6. Project delete by admin Lead --
7. Project delete by lead Admin --
8. Modify task title and description Admin, Team, Lead Admin, Team
9. Comment task / issue by lead Admin, Team, Lead Admin, Team
10. Comment task / issue by admin Lead, Team Lead, Team
11. Comment task / issue by team Admin, Lead, Team Admin, Lead
12. Assign / Un-assign task Admin, Team, Lead Admin, Team
13. Request review task Admin, Lead Admin, lead, Team
14. Close / Re-open / Re-assign task Admin, Team, Lead Admin, Team
15. Delete task by admin Lead, Team Lead, Team, Admin
16. Delete task by lead Lead --
17. Add issue by lead Admin, Team, Lead Admin, Team
18. Add issue by team Admin, Lead, Team Admin, Lead
19. Add issue by admin Lead, Team Lead, Team
20. Close / Re-open issue Admin, Team, Lead Admin, Team
21. Delete issue by lead Admin, Team, Lead Admin, Team
22. Delete issue by admin Lead, Team Lead, Team, Admin


Administer messages

 
You need to login as administrator or project owner to access messages and attachments. Messages and attachments related to your projects and tasks can only be accessed. An administrator is however able and authorised to access any project, task or issue.

In order to do this you will be required to navigate to project view, task view and issue view page.

screenshot of admin message board
View message

screenshot of admin message board
Delete message
Any message that has been deleted by a user or a project owner are hidden and not visible on the message board, however an admin will still be able to view messages which have been deleted. Only administrators are able to permanently delete messages so that one can no longer view them.


Revoke message
Messages which have been deleted my any user or project owner are only visible to administrators and are hidden from other users on the message board. Administrators are able and authorised to revoke hidden messages and then once again make them visible to all on the message board, thus enabling all users to be able to see and read this message yet again.


How to bookmark

 
You need to login to TrackThrough system. Users are able to bookmark certain items such as projects, tasks, comments and messages in order to refer back to them quickly when one needs to refer back to a certain message or even when one needs to access a project or task quickly. Navigate to project view, task view or issue view page to bookmark.
Screenshot of project bookmark
Select bookmark icon
Click on the bookmark icon to bookmark the project, tasks, issues and comments.


How to view projects, tasks and issues?

 
In order to view project content, you will need to log into the TrackThrough system, navigate to the projects page.
screenshot of hiding project contents

screenshot of showing project contents
Hiding and showing the project contents
Select collapse icon collapse icon in order to hide the project content.


Select the expand icon expand icon to see all contents of a project that has been hidden.

screenshot of showing task contents

screenshot of hiding task contents

Hiding and showing the tasks or issues
Select the expand icon expand icon 
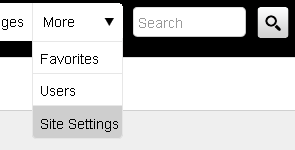
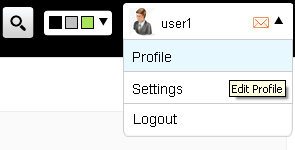
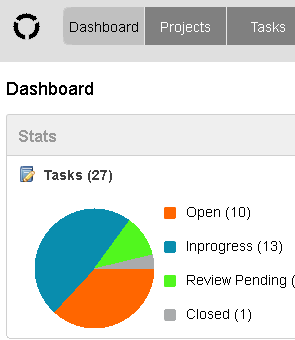
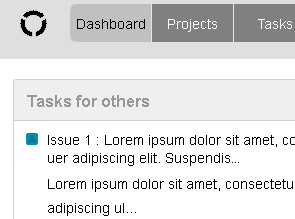
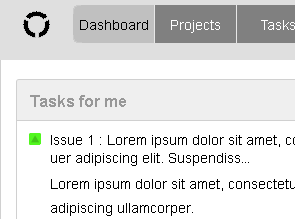
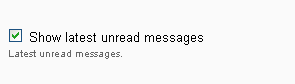
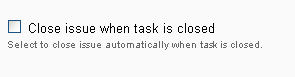
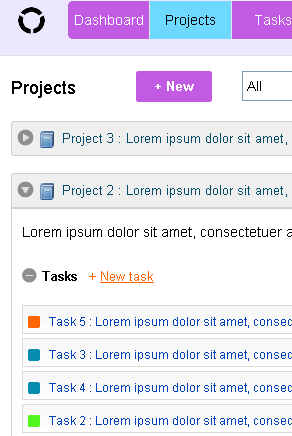
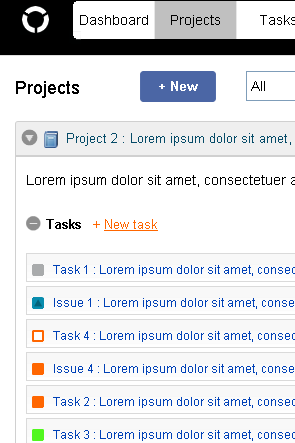
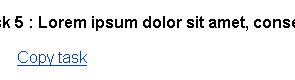
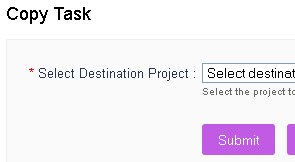
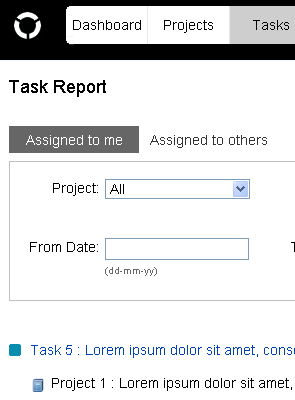
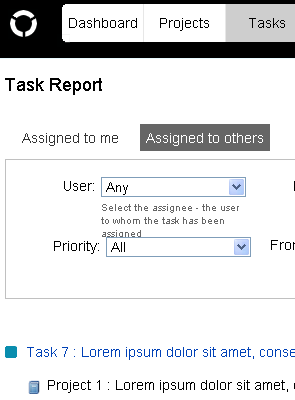
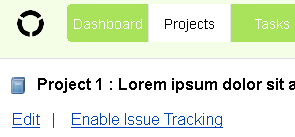
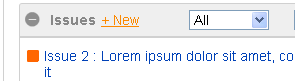
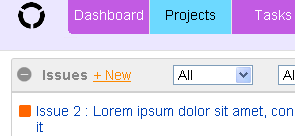
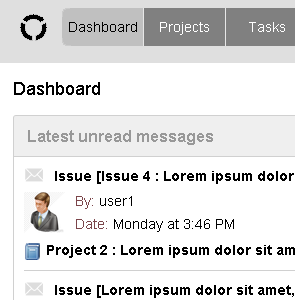
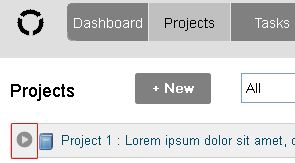
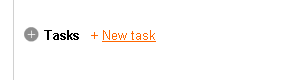
to see all the tasks or issues contents.

Select the collapse icon collapse icon 
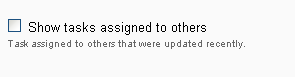
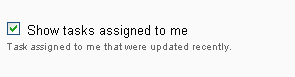
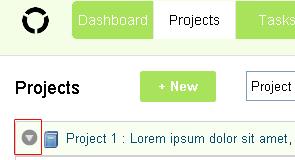
to hide all the tasks or issues.
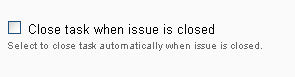
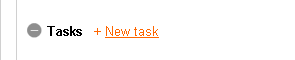


Filters

 
The tabs - Projects, Tasks and Issues provide a filter to display based on status; e.g.: display open tasks or issues. There are 3 filters as follows:
screenshot of project filter

Project filter
This is where a user selects a project in order to be able to view tasks and issues specifically about and relating to the selected project.

screenshot of task filter


Task filter
This is similar to the project filter, but is specifically for the tasks. Select any task status in the task filter on the project pages and then the user is able to view tasks based on status or progress made on the task.

screenshot of task filter

Issue filter
Again similar to the above 2 filters, just directed at issues, a user selects any issue status in the issue filter and is then able to view issues based on specific status.

screenshot of task Priority filter

Task Priority
This is similar to the task status, but is specifically for the tasks. Select any task priority in the task priority filter on the project pages and then the user is able to view tasks based on priority.

screenshot of issue priority filter

Issue Priority
This is similar to the issue status, but is specifically for the issues. Select any issue priority in the issue priority filter on the project pages and then the user is able to view issues based on priority.

screenshot of sorting task or issues in ascending order

Sorting Ascending
Sort of Tasks or issues in ascending order.

screenshot of sorting tasks or issues in descending order

Sorting Descending
Sort of Tasks or issues in descending order.


Searching content

 
screenshot of projects page


Enter a keyword to search
You can find a search bar in the header with a Go button next to it. Should you need to search for any term, word or phrase, you can do so here by simply entering what you need to search for into the search box and then click the go button. If there is content relating to the term or phrase you have search e.g.: (project description, task title, etc,.), it will then be listed after the search is completed.

screenshot of search result page
There is also a section where you can refine your search and add more detail to your search criteria. This can be found in user settings.


How to create your own theme?

 
Many users like to add their own personal touch to the TrackThrough system and this is done in the form of themes. The systems does have predefined themes, however in this section we learn how to create our own unique theme for TrackThrough. This is simply the process of altering the visual appearance on the system.
Creating a folder for the new theme
Firstly you need to create a new folder in the resources\images directory, name the folder the name you would like to give to your theme.
e.g.: new_theme

Creating style.css file
Copy the file style.css from some other theme folder, e.g.: red theme folder. This can be located at, resources/images/red and into the new folder with your theme name that you have just created(new_theme). Edit the file style.css (resources\images\new_theme\style.css) and override styles you wish to alter.

screenshot of changing theme
Creating pallet image for the new theme
This refers to a coloured icon that identifies your theme. Create a 13x13 square icon of your choice, uses Photoshop or Gimp to do this, ensure the image file is in PNG format and should have a name similar to theme_theme_name_png.
eg: theme_new_theme.png

screenshot of changing theme
Adding your theme to config.ini file
Edit the file config.ini and add your new theme name under the themes section.

screenshot of changing theme
Locating Your theme in TrackThrough
Now you can find your theme in theme pallete on menu bar.

Examples for overriding style.css file
Assume we want to change menu tab to have green background color. Locate the following in style.css and override as below.
menu a{background:#F1EEEE; color:#000000;}
to
menu a{background:#A9E35B; color:#FFFFFF; border:1px solid #A9E35B; width:78px; height:24px;}